

OVER-NOTIFIED? IT DOESN’T HAVE TO BE THIS WAY!
Do you ever get tired of the constant barrage of notifications that await you at every turn? Between all of your apps pinging you for attention, email alerts, and incessant reminders, it’s a wonder you’re able to focus on anything in a day. In fact, these distractions might be sucking up more valuable time than you think. Research has proven that every time you are interrupted from doing a task, it takes about 25 minutes to regain focus. When you’re on the clock, that adds up to a lot of wasted time and money.
Here’s the good news: you don’t have to deal with any of it! Unless your life truly depends on knowing when someone likes your Instagram post the second it happens, or any time one of your fantasy players gets taken off the injured list, keep reading. Below are some tips we’ve found helpful to cut down on your notifications, minimize distractions, and become your most productive self.
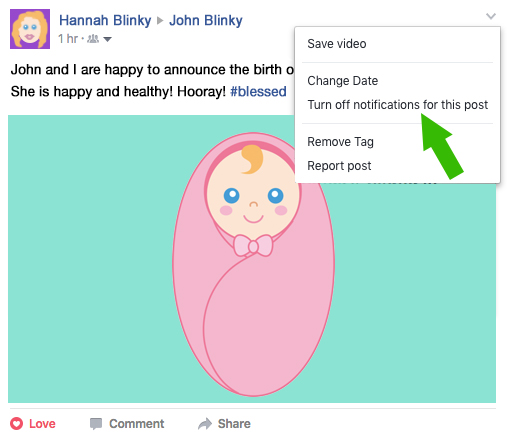
Your friend just announced the birth of her baby. Of course you want to congratulate her, but doing so will throw you into an endless pit of notifications anytime somebody comments after you.

Sorry, Ann. I don’t care what you think about Baby Blinky.
Fortunately, there is a way to turn off this setting. Go to the original post, click the drop down arrow in the top right corner, and choose “Turn off notifications for this post.” That’s it! You can now move forward feeling good that you publicly validated your friend’s foray into parenthood without all those pesky notifications.
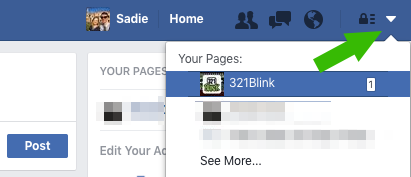
Now, if you are a business owner or someone who manages several social media business pages, chances are, you are inundated with tons of additional notifications on your phone and desktop. If it’s not pertinent for you to see every comment/like/review in real time, there are settings within Facebook to choose what you want to see and when.
First, go to the page you manage and click Settings in the top right corner.
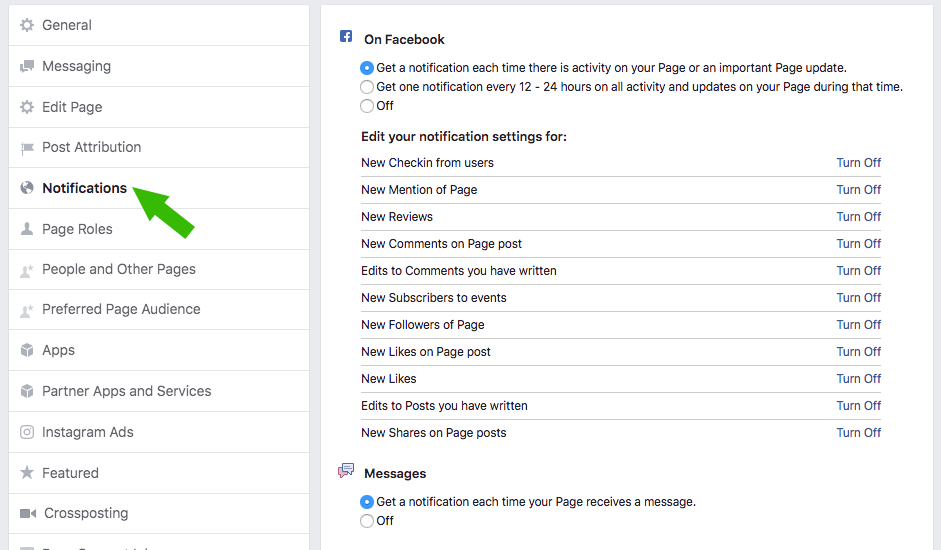
Click Notifications in the left menu, and you’ll be able to: select which notifications you want to receive, choose to receive them as they come, or in a once-a-day digest, and dictate if you also want to be notified via email or text.
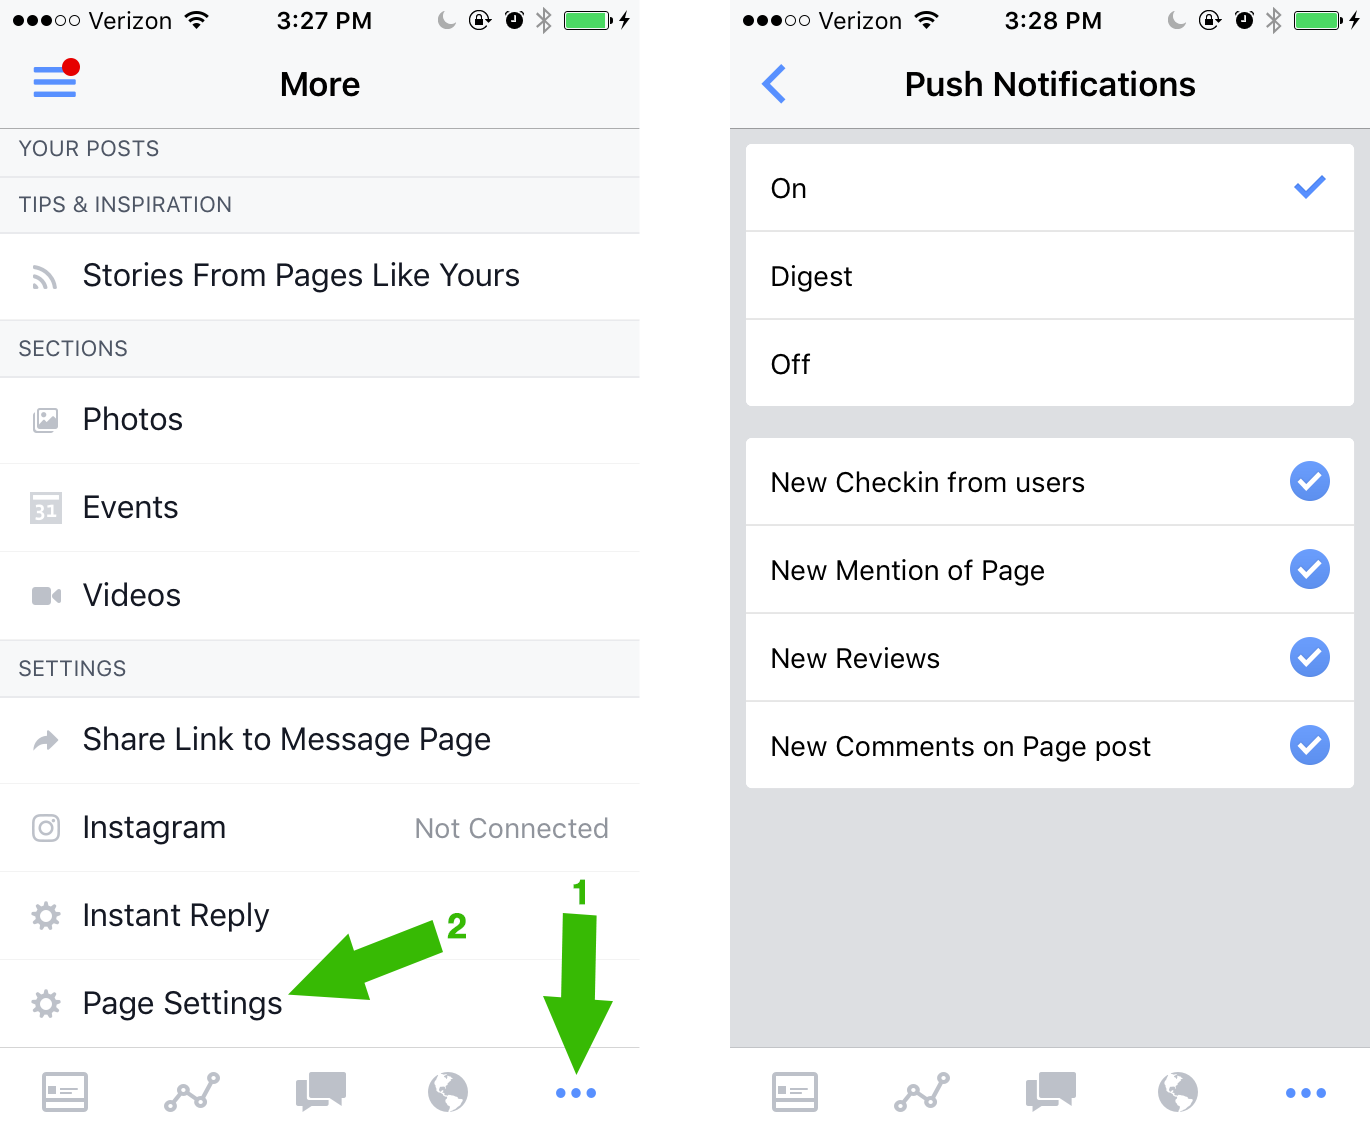
If you use the Facebook Pages Manager app on your smartphone, go to your business page, choose the “…” icon in the bottom right menu, and scroll down to Page Settings. Then, choose Push Notifications and adjust the settings to your liking.
Mac/Apple
For those of you who use a Mac computer, an easy trick to mute notifications is the Do Not Disturb setting. In the top right corner of your screen, click the “bulleted list” icon to open your notifications menu. Use your mouse or touch pad to scroll up, which will make the Do Not Disturb button appear. Turning it on will hide pop-up boxes from emails, Slack, iMessage, and anything else you have running. This setting will remain on for 24 hours unless you turn it off before then.
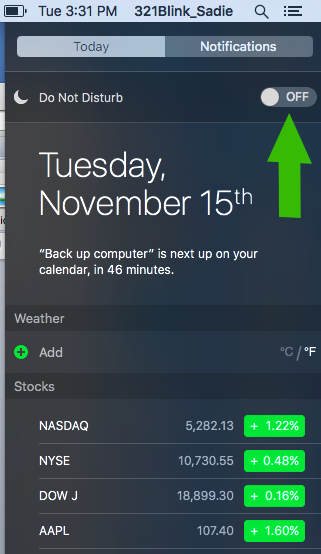
Bonus: This will prevent alerts from popping up during your big presentation.
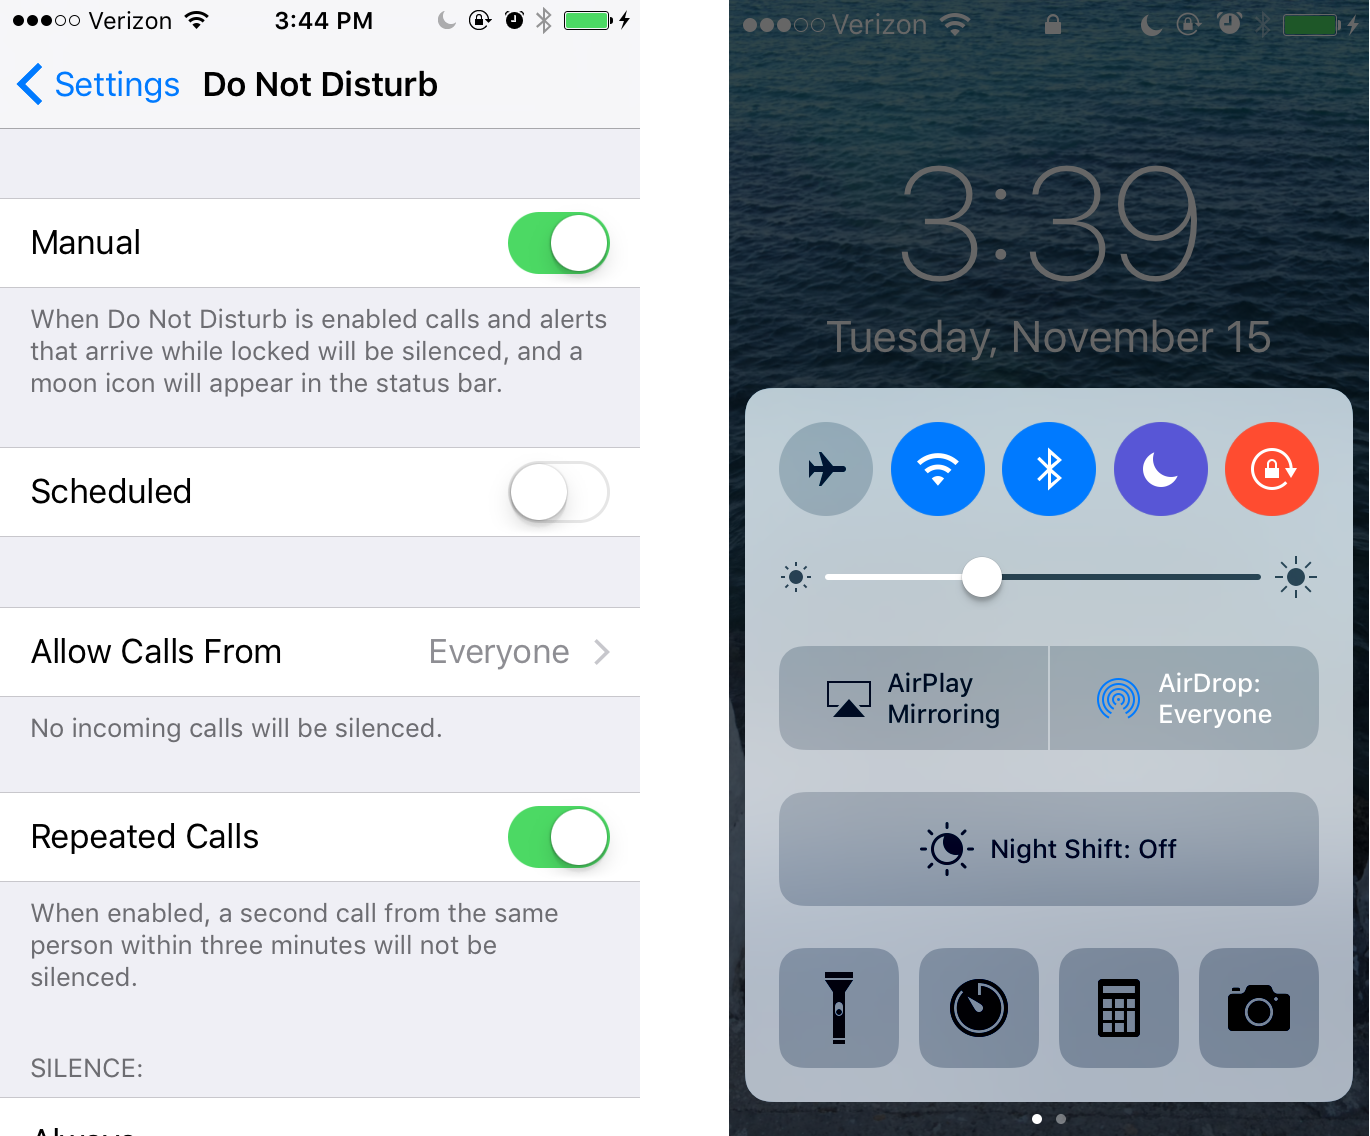
You can also set Do Not Disturb on your iPhone by going to Settings > Do Not Disturb. From here, you can change specific settings, such as if you still want your phone to ring when someone calls.
Once you set your preferences, you can quickly activate Do Not Disturb by swiping up from the bottom of any screen and selecting the “moon” icon.
Snapchat
If you’re an active Snapchat user, your phone is likely in a constant state of notification-caused chaos. Save your battery (and your sanity) with a quick change of your settings.
On the camera screen, click the “ghost” icon at the top, then the “gear” icon at the top right of the screen. Scroll down to Notifications to edit those settings.
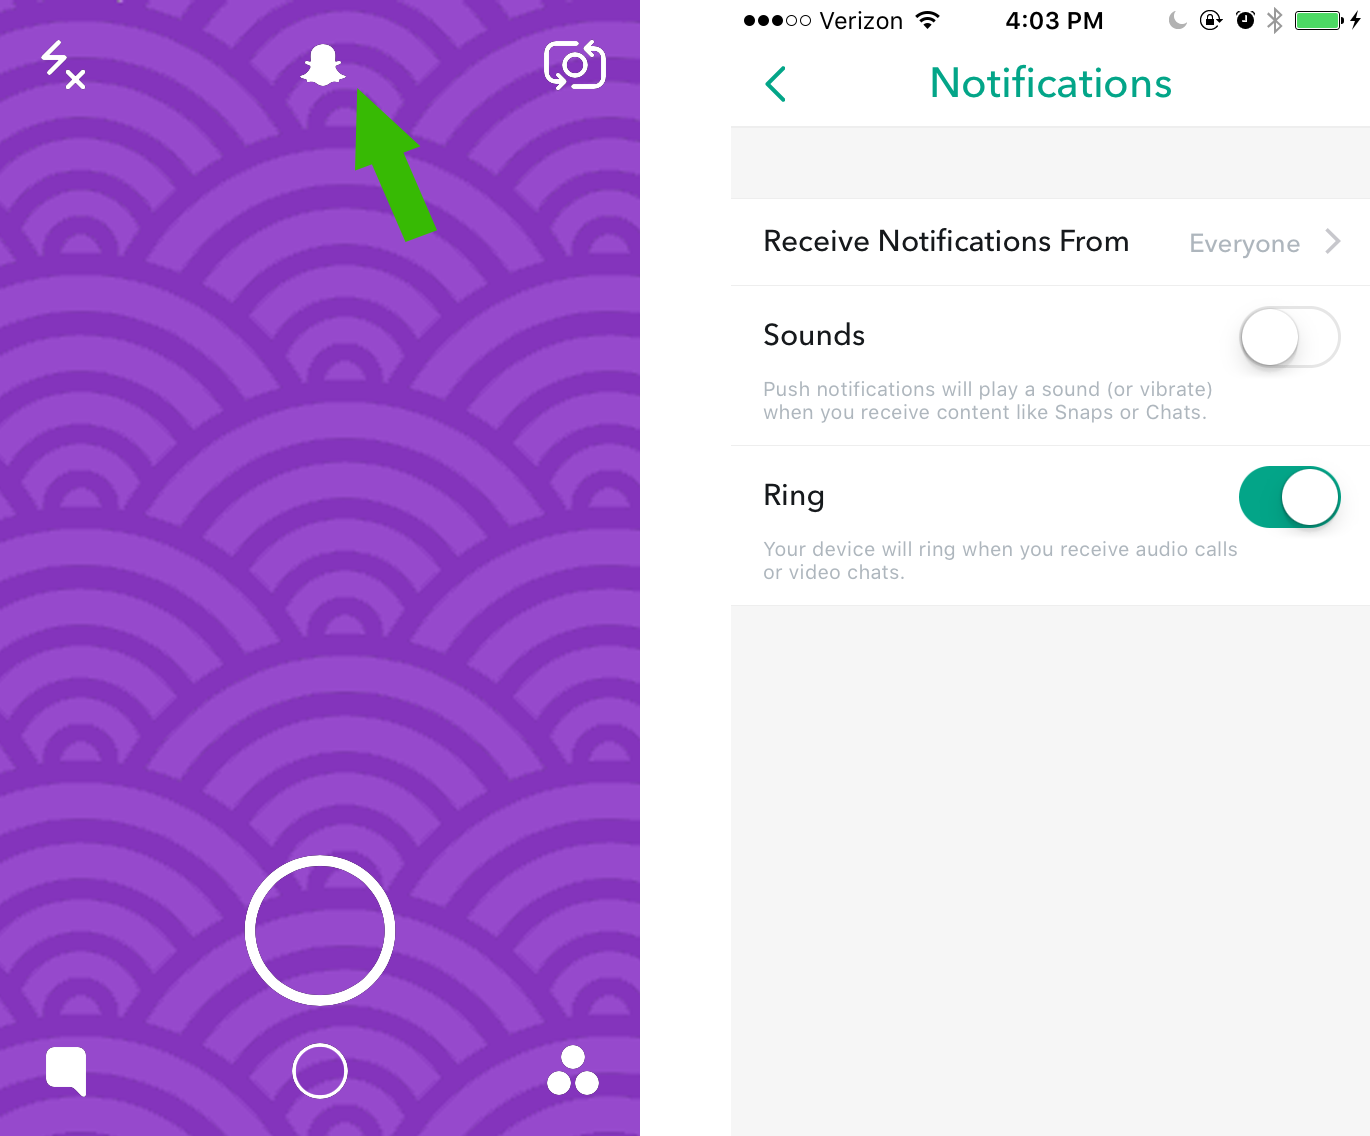
If that’s not enough for you, go into your phone’s settings, choose Snapchat, and edit the notification settings that way for greater control over which alerts you receive. On an iPhone, you’d go to Settings > Notifications > Snapchat.
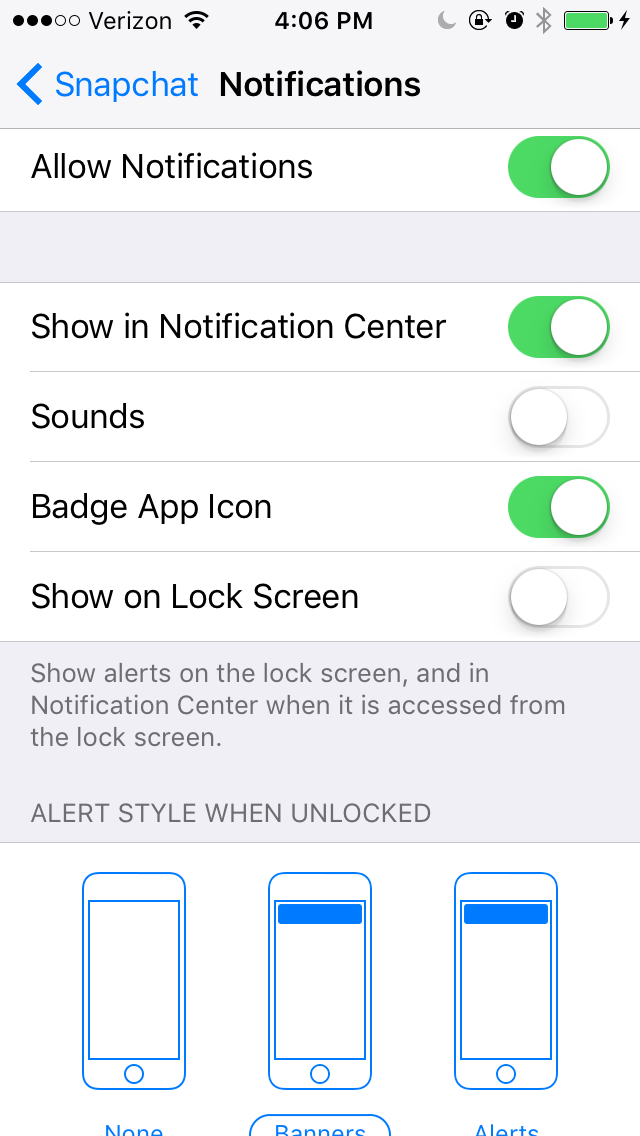
Similar to Snapchat, Instagram lets you edit your notification settings within the app itself, but you may also need to update your phone’s settings to effectively stop unwanted alerts. Again, on an iPhone, you’d choose Settings > Notifications > Instagram.
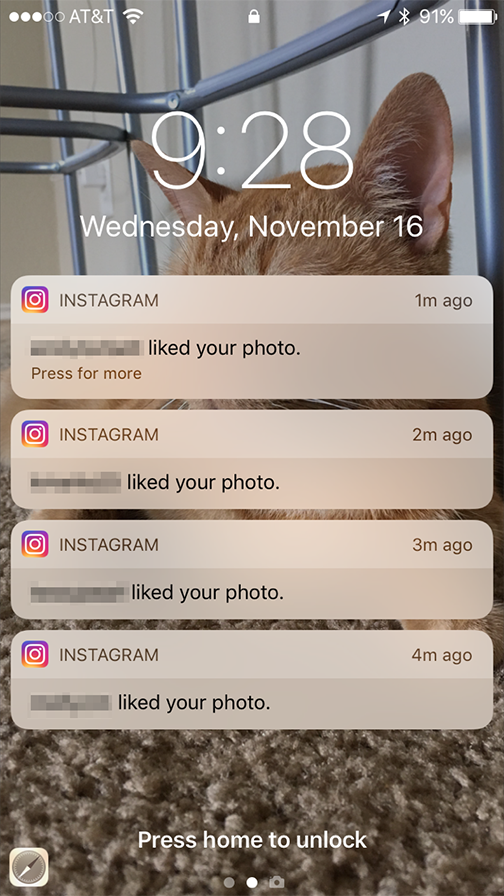
Make it stop.
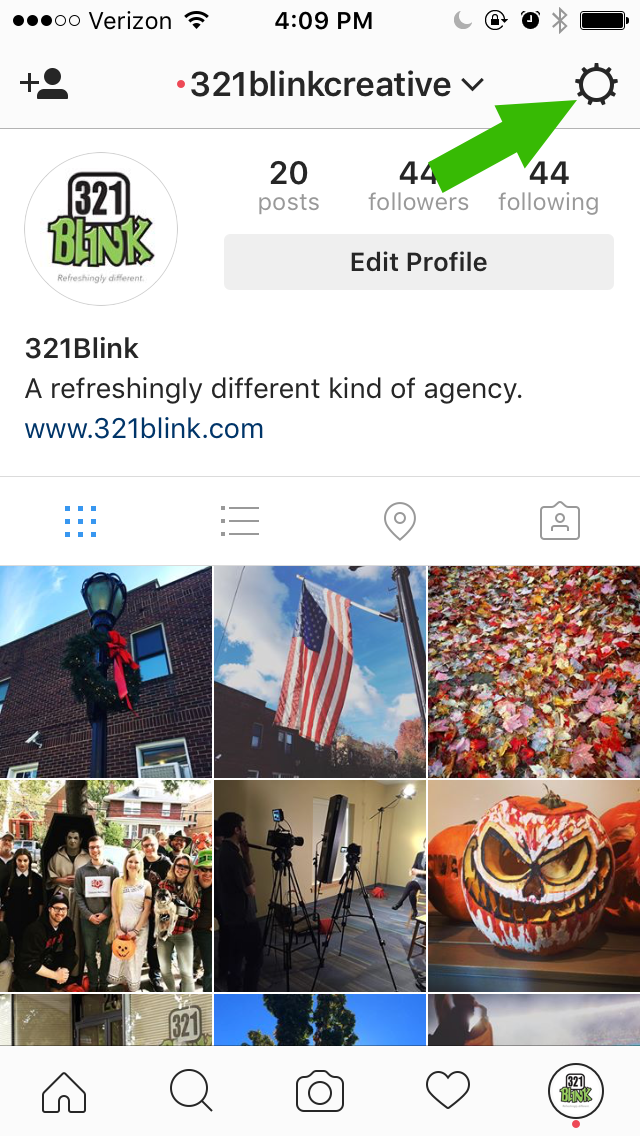
In the app, view your profile and click the “gear” icon in the top right corner. Scroll down to “Push Notification Settings” to choose what you want to see or block, from new follower requests to notification reminders (Does anyone actually want a notification to remind them that they have an unseen notification? If you are one of those people, please share. You are an enigma.)
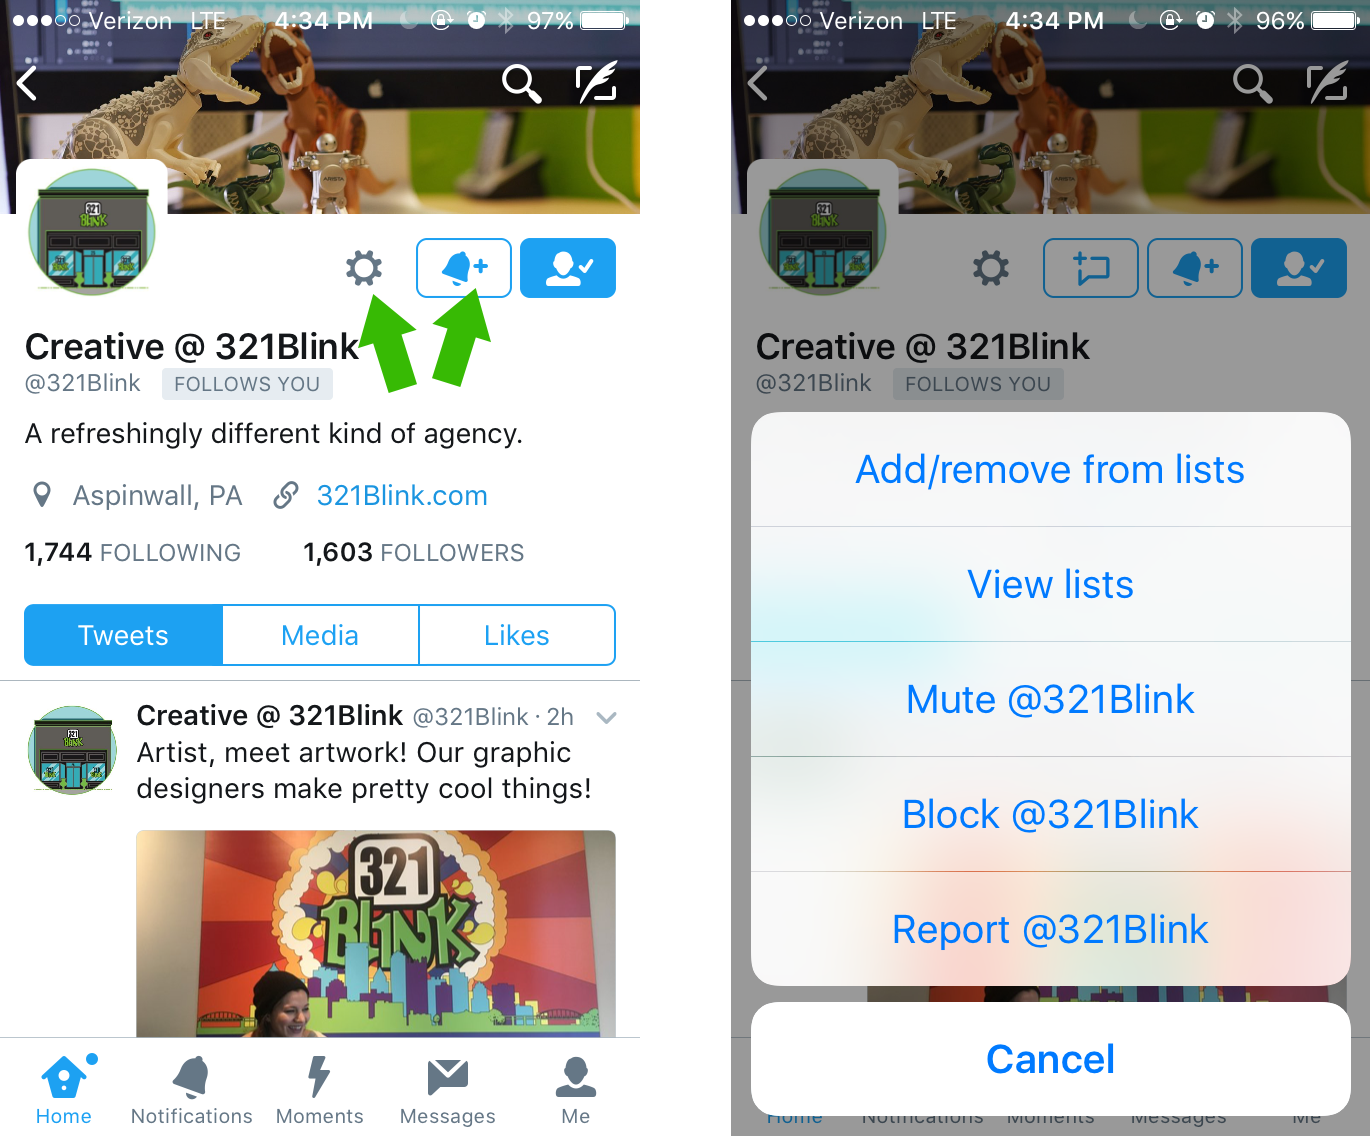
For avid Twitter users, it’s common to set special alerts to know when your close friends or favorite accounts are tweeting. All is well, until your cousin Harold starts live tweeting during The Walking Dead season finale and spoils everything for you – all while blowing up your phone with notifications in the process.
First of all, shame on you, Harold! Luckily, there is an easy fix. Just go to the perpetrator’s Twitter page and turn off the alerts by toggling the “bell” icon. You can go a step further by clicking the “gear” icon and muting the person for as long as you want.
And, if you’re being harassed by internet trolls, Twitter just released some more advanced options for filtering out unwanted tweets from your newsfeed.
There you have it! It’s our hope that by doing these simple updates to your notification settings, you’ll be able to have greater focus and do your best work yet. Good luck!
More Blogs

Unlocking the Power of Video in the Manufacturing Sector
Video in B2B Marketing Tells Your Complex Story In the industrial manufacturing sector, clearly communicating the intricacies of your processes is key to attracting and retaining customers. Potential clients, especially those with engineering backgrounds, need...

Three things every new grad (and old) grad should know.
-Tim McLaughlin, Founder / Chief Operating Officer Some of the most rewarding days of my career are the days I’ve spent mentoring as part of the Pitt Career Center and the Pitt AIR (Alumni in...

How Humor and Cleverness Can Transform B2B Marketing in Manufacturing, Industrial, and Tech Sectors
For B2B companies to differentiate themselves, it is crucial to embrace creative ideas and ingenuity in their marketing communications. By Mark Dello Stritto In the world of B2B marketing, companies in the manufacturing, industrial and...